Wednesday, October 28, 2009

:Thank You:

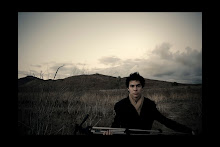
I volunteered to participate in an art show going on at my church, and the theme of the art show is "Thank You". I had and idea previously, and decided it would work with the theme. The idea that I had was to take portraits of Christian people in their every day environment (I call it their "natural habitat") holding a wooden cross to show that they are Christians.

I had the idea when my mom told me about Arthur Blessitt, who just finished walking through every single nation in the world carrying a huge wooden cross. He took the verse in the Bible that says "take up your cross" quite literally. This reminded me of the concept in 1 Corinthians 10:31, "Therefore, whether you eat or drink, or whatever you do, do all to the glory of God." I wanted to capture this somehow. People giving their lives to God in everything they do, so I decided upon this idea. The theme "Thank You" fits in there nicely. These people are thankful for what God has given them, so they do it to the glory of God.

Anyways, I've got some photos I want to share. I shouldn't really be sharing these until my art piece goes up in November, but since I'm not fully done with it, I'll show you a few of the photos. Let me know what you think!

-Steve


Sunday, October 18, 2009

A Self-Portrait Explained.


So, I took a self-portrait the other night, and I want to explain it to you. A few things to explain, and I hope you're interested; the camera settings I had, the lighting that I had, all that fun stuff.

Well first off, I'm shooting with a Pentax K10D, which is a 10.2 megapixel camera that I got used for about $399 of Craigslist. I go with Pentax cause I'm not paying for a brand name.

The lens I'm using is a Tamron (again, cheap, but fairly good quality stuff) 28-75mm f/2.8. It is by far my favorite portrait lens out of the other two lenses I have....... (50mm f/1.4, and the Pentax kit 18-55mm)

Now I don't exactly remember what settings I had it on, but here's how I figure it out. If I'm not trying to capture a fast action, or blur an object moving fast than I'm not going to adjust shutter speed first. Since I didn't really like the way my front door and the hall to the stairs looked behind my head, I used f/2.8 as my aperture (wide open). That way the door and hallway will blur into the colors of the wall, which were white, and you'll get this nice smooth grey like a backdrop. A low aperture and a far background is a good way to get rid of busy or ugly scenery. It was also pretty dark in my living room, but since I had my flash I guess that doesn't matter. When I connect my flash up to my camera (I used a flash extension chord, I'm not exactly wireless) my camera can't use shutter speeds over 1/180th a second, and since my flash is only emitting light for that length of time, that's as long as I need it open anyways.

If my face is too bright or too dark, I can do one of two things: 1) move the flash closer or farther away from my face, or 2) turn up or down the ISO on my camera. I like to keep it at 100, but I'll go as high as 560. You'll start getting noise around 400, so careful. My face was too dark at first, but I wanted to keep the lowest ISO as possible, so I moved the flash closer to my face.

You'll notice that the light on my face is very smooth, it doesn't look like the flash from the camera your mom uses at birthday parties that sits in the drawer with the pens all year. There's two reasons for that. The first is that I have it off-camera. It's moved camera left and raised a little bit. Not too much, but enough to not be straight on. In your normal life, you never strap a light to your head and look at people. I don't know why they ever did it for cameras... The second reason it looks nice, and this is the smooth reason, is because I have it shooting through a beauty dish. Familiarize yourself with the DIY beauty dish link, cause I'm going to keep talking about it. I have a 14" beauty dish, which was about a foot or two away from my face. The top of the bowl was above my hair and the bottom of the bowl was the same height as my chin, and it expanded the width of my head, as my head is not 14" wide... So you can imagine, if light is bouncing into the bowl and being sent back out of it, that the light is pretty diffused. This explains the softness of the light, and why beauty dishes are called what they are. Cause I'm freakin' gorgeous in this picture. No photoshop. (Juuuuuuuuuust kidding....)


Most photos with off-camera lighting have more than one light. I don't make much monies from photography, so I'm not going to spend any on lighting right now. (Also, I'm an audio engineer, so I'd rather buy a Digi 003 or something like that...) I have found flashes that work (only one power setting) at thrift stores and stuff for VERY cheap. Like, $3 cheap, and here is a good example of one above.

The self-portrait above, however, is just one flash, and I did this because I had thrown on my button down shirt and tie, and my cardigan, and I was kind of in a hurry cause I didn't want my roommate coming home and catching me. Not that I post it all over the internet, but it's just weird when you're taking the pictures. It's like doing a video blog in front of your mom.


I'm usually not into "meaning" behind art, I'll usually just make it really really really ridiculously good looking. I'm trying to be a fashion photographer. The "bigger picture" is printing it 13"x19". This one is different though. I did add meaning into this, and symbolism.

Tuesday, October 13, 2009

The Zombie Apocalypse and You.

For the past 5 years or so, zombies have been a major pastime in the thoughts of the American youth. But here I am, asking a very important question: Seriously?

WARNING: I feel a rant coming on.

So, what is it about a fictional and completely retarded horror film theme that keeps kids on their toes, and on the tips of their tongue are their strategies on surviving this apocalypse. Apocalypse? Please. I know all of you are thinking that I will be the first to go in such an event. Cool. I guess I'll also be the first to die from global warming too.

After thinking about it though, what do I waste my time thinking about? To be honest with you, it's probably politics. So there you go, zombie kids, we're even.

Monday, October 12, 2009

Um, you lost me.

I've always told myself that I do things for myself. Most of the things I do. I'd say 90% of the things I do are for myself. I mean things like work, studying, art things, blogs, (yeah right) but 10% of the time, or usually more, I've got someone in particular that I'm actually writing to. Yes, this blog is to the masses, but it's for an individual as well. I'm not saying it's directed at that person, but I'm thinking about them reading it, and what they'll think.

I suppose that's my way of criticizing myself. Or maybe I'm paranoid. I once asked my friend Evan if he thought about people ever reading his journal when he was writing in it. He said no. I've never felt that. I've never once written something without concealing what I could have secretly said to myself. Is this an ongoing editing process in my mind, censoring out the things I don't want anyone to know? Am I a product of the criticism that I assign to imaginary personalities posing as people that I know?

I was thinking today about who I want to be. The person I want to be is different than who I am. How did I turn out to be who I am? Perhaps I am who I am because I am trying to be someone else all the time, and in that molding I have shaped a personality that is different. Who knows what Bob Dylan was thinking when he wrote songs. If someone who wants to be him knew those thoughts, and thought them as well, would they write songs like Bob Dylan? I find that highly unlikely. I also thought today, what if someone wanted to be like me, what would they turn out like? A selfish thought, I'll admit that, but it's interesting to take the qualities of your outward appearance and try to give them meaning by means other than yourself.

In the end, what it boils down to is this; the thoughts in our heads are ours to keep, ours to try out first. No one can take that away from us. If you don't want them stolen, keep them a secret. I keep those secrets. How I operate is a secret. It's going to be hard enough finding a job without another me applying everywhere. So, what you should gleam from all of this is that you should hold on to your own thoughts, and don't follow to closely behind others or you'll lose yourself.


My thoughts are all over the place. Anywhere but the 200 series Pro Tools certification studying....

Tuesday, October 6, 2009

Le Electric Guitar: Electronics

I devised these sections up really weird. A whole post devoted to pickups? Well, at least you know pickups really well now. That means I can get started on electronics.

With your standard Fender Telecaster, you'll have a volume knob, a tone knob, and a 3 way selector switch. I believe Strats have two tone knobs, one for the neck and middle pickup and one for the bridge (which is just stupid, but someone thought that was a good idea.)

Ok, first off, let's take a look underneath the pickguard and control plate. (Again, I am modeling after the Telecaster, but principals are still the same.) Here you'll see all the things that will make you want to be extremely careful.


I love the control plate on the telecaster, because you can get to almost all of the electronics without taking off the strings or even the pickguard. To the far left, you see the tone knob, followed by the volume knob in the middle, and the tone knob on the left. A very common thing I find is that the potentiometers (volume  and tone controllers) come loose and wiggle. All you need to do is pop off the knob and tighten it with pliers on the nut and your fingers holding the other side.

Some knobs are screwed on by a little screw in the side. You can see one in the picture. These don't pop off. You get a tiny flat head and loosen the screw and it comes off very easily.

Moving on! What makes the volume knob volume? A potentiometer is a variable resistor, which means you can control how much signal it is stopping. If the volume knob is turned all the way up the signal flows freely and as loud as possible. When the volume is turned off, the potentiometer is sending all of that signal to ground (anything metal, as long as it is connected somehow to the other grounding points) so that no signal is coming through. The way the signal increases or decreases depends on the type of potentiometer you get. (I recommend 250K-500K Ohm Audio Taper pots.)

Tone! What is actually happening when you turn the tone knob? Well, it's actually very similar to a volume knob, except one thing. Instead of sending signal to ground when the tone knob is turned all the way down, a capacitor is connected to ground so that all of the signal is filtered through it before it's sent to ground. This will filter out the high frequencies, which some people like. The amount of high frequencies you cancel out depends on the capacitor. (I recommend a 47uF capacitor. Not too much, not to little.) When the tone knob is turned all the way up, no signal is being filtered, so you hear the untampered signal coming straight from whichever pickup is selected.

Wiring 2 pickups to a 3 way selector is easy. The way telecasters are wired have the neck on position 1, neck and bridge on position 2, and just bridge on position 3. Strats are basically the same, but with 3 pickups and a 5 way selector switch. Neck on 1, neck and middle on 2, middle on 3, middle and bridge on 4, bridge on 5. The way you wire this is simple. First take your selector switch and place a wire connecting the two top left and two bottom right tabs on the selector switch. This wire will go to the volume potentiometer. After that, the neck pickup positive wire (colored) goes to the top right tab, and the bridge pickup positive wire goes to the bottom left tab. (This way when you select position 2, the wire going to the volume pot will be connected to both the neck and the bridge. Then wire all of the ground (black) wires to ground. (Usually on the top of a potentiometer.)

Much easier in a picture.

Now, we have almost everything wired up. I still need to explain this grounding concept. When your guitar is improperly grounded, it will buzz unless you touch anything metal on it. This is because the circuit completes its grounding by using you as it's ground. A circuit needs large amounts of metal to send all of it's unwanted signal to.

Everything you connect to "ground" has to be connected together. So wire the tops of each potentiometer to each other. Wire the capacitor for the tone knob to the top of the tone potentiometer. Wire the ground prong from the volume knob to the top of the volume potentiometer. Wire the ground wires from the pickups to the top of the potentiometers. Wire the shield from the input jack to the top of a potentiometer, and wire the top of the potentiometer through a hole in the guitar to be squished underneath the bridge plate. This connects the ground to the bridge, the strings, the tuning pegs, and all things metal on the guitar.

Ok, last thing here. How to wire the actual guitar signal. Wire the tip of the input jack to the middle prong on the volume potentiometer. The left prong on the potentiometer should have both the wire from the selector switch and a wire connecting to the left prong on the tone potentiometer. (I'm just describing the schematic shown above, basically.) Middle prong of the tone knob has a capacitor connecting to ground.


Ok, I think that's it as far as standard electronics in the telecaster.

If you need different schematics, this is the place to go: Guitar Electronics

I'll do part two of electronics if you'd like, going over advanced wirings with humbuckers and stuff like that. Email me for suggestions, or follow the blog and leave a comment!

Sunday, October 4, 2009

Le Electric Guitar: Pickups

I am starting a series on instruments, because I know many people who play instruments well, but don't understand the instrument itself. Here I'll offer brief explanations on how to fine tune it, whether that be electrical or physical adjustments.

I'll start on the electric guitar, since many many many people play. Also, you pianists don't have to adjust your instruments much, and drummers, you have bigger worries. (Though I wish I had the privilege of parking in handicapped spaces...) I'll get to you guys later, don't worry!


Alright, let's start with all the general parts of the guitar. I'm going to refer to the Fender Telecaster, since I have more experience with those than any, but these general rules apply to all electric guitars. From top to bottom we have:
  • Headstock - includes tuning pegs and usually access to truss rod adjustment
  • Neck - includes frets which are more important than you think
  • Body - composed of roughly 3 parts: Bridge, Electronics, and Pickups.
I feel like that covers the basics. Part 1 will cover the first question you'll encounter when telling someone about your guitar. What kind of pickups do you have?

Pickups
How do pickups work? Well, pickups are just magnets that vibrate when the string is played. A guitar string doesn't move back and forth, per se, but rather in a circular motion. However many times the string completes a full circular rotation in a second determines the pitch. If the string is completing 440 rotations a second, that is called 440Hz (Hertz) or in musical terms, Concert A. The magnets will "pick up" (can't get that out of my head) on these vibrations. There is a separate magnet for each string. A coil is wrapped around the magnets to pick up their vibrations. A magnet moving back and forth through a coil creates electric current. This electric current is what is amplified.

There are two different types of pickups. There are single coil and double coil (or humbucker). The single coil is a standard pickup, found in most Fender guitars. For instance, the Stratocaster guitar has three single coil pickups. The original. They gave that thing steroids, and it's got like, ten arms now.

The humbucker is more common in rock or heavy metal. Basically instead of a single coil, it has another one right next to it. The whole ideology of the heavy metal genre. (So if you're not playing an Ibanez or a Jackson, get out, n00b.) There are way more possibilities with humbuckers when you wire them up. You can actually wire the toggle switch to switch between single and double coil in just one pickup! (Insert nerdy excitement.) I won't get to that until the electronics section.

What makes a pickup "hot" is the magnet type. The stronger the magnets in the pickup, the better it will be able to read the vibrations of the string.

A common misconception is that any metal (or anything for that matter) touching the pickups at all will hurt the guitar. Nope. You can touch those things with metal all day. Just don't have the amp turned on. That's really what you're ruining.


Ok, I think I've talked enough about pickups. Next in this series will be about how to put the pickups in and the electronics behind all those knobs! (One of my better segues.)

Saturday, October 3, 2009

Bands: How to make monies.

I have recently recorded and mixed a band, and am hoping to continue working with them in the future. I realized that bands have a hard time going from myspace to itunes, and in this blog I'm going to try and explain how to do that.

So you've got all your songs and people are grooving to them. Hopefully you've taken some vocal and music theory classes. You are the vessel in which your art flows, you are the medium in which you express your thoughts and feelings, so let's hope you are playing because of the art and not because of the limitations.

The next step is to practice. Practice so hard it hurts, and I mean this. When you go into the studio, you don't want to be trying to remember your part, or having the whole production stall because you can't seem to get it right. Figure out all of the tempos to all your songs if you plan on playing to a click track (HIGHLY recommended.) Also, if you plan on playing to the click track, make sure you can actually play to a click track.

Now the average studio will charge around $50 an hour or about $400 to book the whole day. Give yourselves plenty of time. I would say an hour per song (if you have practiced, practiced, prazacticed!) after the initial hour of setting up and last half hour to tear down. This first day you'll just record drums, bass, scratch guitar, scratch vocals.

So the drums and bass are done. Hopefully the studio gave you the Pro Tools session to take home. Solo the drums and bass and practice to them. This is your job, your salary, your statement to the world. It needs to be as perfect as you imagined it. NEVER settle for good enough. If it's possible, take your drum and bass track to an Pro Tools engineered with a 110 level certification or higher and get it beat-mapped to ensure that the drummer is spot on. (Don't worry, if the engineer knows what he is doing this will not reduce the feel of the music to a mechanical humanless beat.)

So you're ready to go back the next day. Do as the engineer says and don't argue. It's good to have honest people there telling you if the take was good or not. Be highly critical of yourself. Here you'll record over the scratch guitar and scratch vocals with the real awesome amazing stuff!

SIDE NOTE: If you're going to record yourself, Number 1: DON'T! (Unless you know what you're doing.) And if you decide to skip Number 1, than Number 2: Please, please please please set all of your levels so they don't clip. (Red lights.) That's losing signal, that's digital distortion, that's suck. Also, this happens when you mix as well. Put a master fader in your mix (Command N, select stereo master fader) and don't clip or else suck happens! You've been warned.

Ok, so now you have the tracks and the session file from the studio session. Take that to a mixing engineer. A good mixing engineer will give you a flat rate per song, not an hourly rate. $20 per song is usually about right, or $150 per album. Make sure you keep a close eye on your mixing engineer, and keep him on track for your artistic vision.

In todays world, mastering engineers want stems, or separate mixes for the drums, bass, guitars, vocals and time-based effects such as reverb. A mixing engineer who knows what he's doing will charge you extra for the stems, but it's a good idea to get them. A very good idea.

A mastering engineer will probably charge $500 for an album, so make sure you have played enough shows to pay for all this. Please don't skip this step. This is very important.

Ok, now you're ready. You've got a professional demo or full length album that you want to share with the world. Who wants it? Well, if you go to the IODA website, you'll find a vast number of services to get your product out there. IODA is an independent distribution company that will be able to get your album into stores and on iTunes.

Final step; send your demo to every label that is remotely like your genre of music. They really listen to the demos, and if you have done all of the steps above, it will be head and shoulders above most of the demos they receive.


In the end, plan on spending at least $1,000. IODA gives it's artists about 85% of the profits, instead of 10 or 15%, whatever iTunes is. If you think you can sell at least 120 albums for $10 each, then you'll start to make a profit.

Friday, October 2, 2009

Do It Yourself - a stereo

Ok, I'm super tired, but wanted to show you a few things you can do if you have a pair of speakers and an old radio or something. (You do not need a tape player, that's just where I got the speakers from)

Recently I came upon the obsession of tape machines, like this one. I had to buy another one so I could fix this one.

The other one was pretty cool, but didn't have the functions I wanted. It had two speakers (sort of rare) on either side of the tape machine. So naturally after I stripped the tape machine of its parts to fix the one above, I just took the whole tape machine out and decided to build a stereo w/ FM/AM capabilities. The tape machine left a pretty good size space, which would be able to fit records. I needed to put in a control surface where all the electronics hide, so I decided that would go vertical on the left so the records could still all fit.


The second tape player above is the one I took out and left the speakers. Now, since I didn't feel like stripping out all of the individual circuits from the tape machine to compile an auxiliary input as well as a radio, I just decided to go to Urban Ore (thrift store) where I got the tape machines and buy a tiny radio. Remember, the only thing that I have left of the tape machine to the left is the speakers. The middle part is all gone and sitting in an ugly junk like pile on my work bench.

After I pulled that thing out I noticed a schematic of the machine glued to the wood behind it. A lot of help that did me... Well, actually, it did help. I'll get to that in a bit. First let me tell you how I turned the radio/cassette player into a radio/stereo input.

On top of this little radio was a cassette player, so I ripped that off and cut the wires. (Maybe a little more systematic than that.) I noticed that there was no on button for the tape player, but when you pressed play, it would connect the power and turn the player on. I soldered these together so the unit was always on. The radio would switch on when you switched from tape to radio. So now I had to take the input of the power and run it through a switch that I stripped from the tape machine. Actually, that's not true, I found a switch in the back that toggled between A/C current and D/C current (wall powered or battery powered) So I took  that switch and used it as the power, since there would be no batteries, the unit would automatically shut off. It probably would have been better if I did what I mentioned before, but who really cares.

The next thing I had to do was take the input to the tape machine and connect an 1/8" stereo jack (headphone jack perhaps). This was pretty easy, but then I realized that the difference between tape and a direct input was about 50+dB (volume doubles every 3dB, so this was about 2^16th (65,536) times as loud as I wanted it to be.) This resulted in a very loud input, and it would distort if anything was over the quietest level known to man. Since I knew how to make a 20dB pad off the top of my head (-20dB) then I just made two so that the signal would reduce by 40dB. (So since we had 50+dB coming in, and I turned it down 40dB, the level is still loud coming in, but not unbearable.)

How do you make a 20dB pad? (You can definitely skip to the next paragraph if you don't care.) Simple. A quick answer, two 1K ohm resistors in parallel while you bridge the two with a 150 ohm resistor on the outgoing side. Know that I think about it, I do know the exact math and should have just made only one pad, of 50 or so dB. Anyways, here's the math, have fun; Attenuation = (R1 + 2(R2)) / R1. Attenuation, by the way, just means turned down. So my pad will attenuate by 40dB.

Oh, something I forgot to mention, I just hooked those speakers from the tape machine up to the wires that were connected to the radio speakers. (You NEED to get a radio and/or cassette player that has two speakers, otherwise there are not enough amplifiers in the circuit and you will either have mono or nothing.)

I felt like this wasn't enough, so I took the VU meters from the tape player (You can see them if you click on the image) and tried to put them in. This is where that old schematic came in handy. Turns out you can't just put those things on the plus and minus wires of each speaker. You can if the speaker isn't attached, but then what's the point, you're monitoring a level that you can't hear. So you have to build a VU meter amplifier, something I took WAY too long to find. The tape machine had a less than perfect solution, which was a diode on the positive side of the meter and a capacitor stretched from positive to negative. Unfortunately, this thing was so old that I broke exactly 1 diode and 1 capacitor in the process of removing them. Radio shack sells diodes and capacitors for about $120981209383410 each.

Let me say this; if you don't build the proper VU meter amp, you're meters will not register the correct frequencies and they will NOT be accurate. This was just a project for my girlfriend, so I stuck a little diode on there without the capacitors, and now the meters read about 64Hz, which is about the lowest frequency a kick drum makes, so those meters bump up and down nicely to the music, and overload if there's anything too bassy that might hurt those little old speakers. You can find a proper VU meter amp here.

So that ended up looking something like this.

This picture doesn't show the VU meters properly attached. I didn't put them on the speaker wire, but rather off of the output jack from my radio/cassette player circuit. A headphone jack isn't useful in my case because anything that will be playing through those speakers will come from the headphone jack of the source, i.e. the record player preamp, the ipod, etc.


Well, it looks like a mess, and I still need to put it all together, but it does work, and I'm very happy!


P.S. I majorly burned myself with the soldering iron and cauterized my skin almost instantly. Please be extremely careful while doing any soldering. Always keep a window open and a small fan going so you don't breathe in the solder fumes. (You'll have the worst headache of your life, trust me.) And for those solder burns, always have Melaleuca oil sitting around because that's the worst burn I've ever had, but the combination of cauterizing it and applying the oil relieved all of the pain. I could poke it in 15 minutes and not feel a thing.
Thursday, October 1, 2009

The In-between

As a child, you always want to dress up in your parents clothes. I remember stealing all of my dads socks in middle school, and I believe the socks I'm wearing now are his. Much younger than that is when children usually like to play dress up. My brother, sister and I had a play box with old shoes, dress shirts, jackets, a brief case, an old phone, glasses frames, things like that. I don't believe I wanted to be like my dad when I was that age, or at least dress like him. I didn't know what he did at all as an adult, so I didn't really think to want to be like him, it just didn't occur to me. Anyways, after the stage of quintessentially disliking my parents as a teenager, I found myself pretending to be my dad.

I remember that night really clearly. I have his old tweed sports coat from his first job, and I put it on one night after a late night cleaning spree (I know you've had one). My hair was long at the time, so I tucked it behind my ears and pushed it all back with my fingers, and as I did this, I realized that the movements I was making with my hands across the sides of my head were mimicking exactly the way my dad would run his fingers through his hair when he was thinking or when he was stressed. (Usually at my behavior.) I then looked through my closet for a collared shirt to wear underneath the jacket and tucked it in my jeans. If only I had a Hawaiian shirt.... Seriously. Anyways, my point being I was trying to look like my dad, and I got scarily close. I just stared at myself, in the mirror, seeing my dad as he must have been at my age. I could see my young dad, but I could also see an older me.

I love the line from mewithoutYou, "I'm not the boy I once was, but I'm not the man I'll be." Here I am, a push from the edge, uncertain, not yet ready to continue. I've longed for much of my life to be business professional. I want to wear a tie to work, I want to have a nice hair-cut, I want to wear shoes with tassels on them. I want to come home and loosen my tie, and have a cup of coffee or tea with my wife. The problem is that I feel as if I'm so far from that. I sit in a classroom with kids who get high every day, and they really must or else they have no excuse for the fashion statements they are trying to make. I would look weird for wearing a button up shirt.

So here I am, unable to pretend I'm an adult because I am so close to actually being one.